Friday, November 13, 2009

"Trust Me"

That is what I said to The Hubster tonight when he walked into the dining room to see what I was doing. His words "It's blue!". Again I said trust me!

This is the second round of Stratton Blue by Ben Moore done Sherwin Williams way. I went in to have them color match since I can not get sample paints in this color at Ace. The first attempt was at full color mix. It was too sea foamy to me. So I went back today and we did it at 70%. Sorry for the poor pic quality. It is from my Twitter album. Picture the bottom half white.
In the end even though I told The Hubster trust me I am not so sure myself. I am totally going against the grain with this color. It is not a "me" color but yet I am very drawn to it. I figure I can bring that color thru out the house in other items such a pillows and other "pretties". My thought is that will then make it flow and not be a "What was she thinking?" in people's minds when they walk thru the front door.

I am making myself go thru with the color because in the end it's just paint. In the end it could end up just as I pictured it. In the end I could love it or I could hate it but I will never know till I do it.

Enjoy your weekend ya'll! Tomorrow I am having an actual girls day out with an old neighbor friend. She invited me to the Nutcracker craft show/bizarre. Never been but always have wanted to go. I have NEVER been away from my men for an entire day all by myself. Wish me luck! Sunday The Nana, Oldest, & Littliest will be going to Christmas Open House/Antiques on the Lawn at Old Oak Cottage. I can't wait and Oldest & Littliest hope there will be more cookies!
Have a good one ya'll!

Wednesday, November 11, 2009

Dining Room Color Inspiration

Happy Hump Day Ya'll! I have 20 minutes till I have to leave to get Oldest so I figured I could squeeze in a quick post. If ya have been following my blog then ya know we moved into a new home abt 4 mths ago and have been working on making it ours. I have major OCD and have yet to finish any one room completely. I either get frustrated, bored, or find something for another room of the house. Not really the best way to get things done but they are slowly coming together.

It took me literally two months and two dozen paint samples before I figured out the color scheme for most of the house. Camel Back by Sherwin Williams for the kitchen. Whole Wheat for the living room and common areas with Svelte Sage also by SW for art niches and insets. I was set on painting the dining room a blue color. I then started thinking that blue would not fit in with the other colors. Then I was back to blue because I said so what who cares if it flows or not. I wanted blue especially after I had found those awesome plates at HomeGoods.

Here is the room in question from our foyer. Yes, that is the indoor/outdoor rug from Ballard! Isn't it divine!!

View of dining room coming from kitchen area. As you can see I have already attempted a few blues and none are winners. The Windsor bench soon will be a distressed black.

View from the dining room windows. Please what ever you do do not tell me ya like the color it already is cause its too late for that and well it is builder grade and does not flow with the SW paint anymore. Ya can tell the difference in the quality of paints. There on the table are the inspiration plates!

Here is a DIVINE dining room. Found this pic on the local yard sale site. They are selling their Crate N Barrel dining set for just $650. Great deal but not needed. What jumped out was her walls and her mantel and her wood floors but mostly her walls. I emailed her and asked her the color. She thought Stafford Blue by Ben Moore. I looked and no such luck. No color existed. Then I stumbled upon a google listing for Stratton Blue by BM, Bingo!

Here are the curtains I am wanting to make. Black Gingham. So what do ya'll think?? Should I have SW color match the Stratton Blue?? Do ya think it will all flow???
Okay gotta get the Oldest. 2 min to spare! Ha!

Monday, November 9, 2009

DIY Rooster Tassel


It is that time again over at A Soft Place to Land for DIY Tuesday! My rooster tassel project actually turned into two projects sadly enough. After seeing The Nester's beautiful tassels and other fellow bloggers I knew I had to try my hand at making a rooster tassel. I ran down to HobLob in search of some poly resin roosters I had seen in other posts. They had exactly two left. A white one and a black and red colored one. I purchased both! I decided to start tassel making with the black one first. I did not like him all black though so to make him go with my decor better I used some Rub N Buff also found at HobLob. I then got out a teeny tiny drill bit and drilled a small hole big enough for me to screw in the eyelet. I was nervous seeing as I read horror stories abt things breaking.

To my joy the rooster survived and I decided to take pics of my progress. Well that led to me almost knocking my sweet tea on the floor which then led to me actually dropping my poor rooster on the floor instead and a few choice words that can not be mentioned here. At first I was disheartened but remembered that I had some type of craft glue that I had used on the boys toys before and gave it a shot.


My poor rooster. She never had a chance really!:)

There is the glue laying on the counter. I was excited once again when it appeared the rooster was going to pull thru.

After gluing the frills on I decided I wanted a bow on its butt so I reused some wired ribbon I already had that was hanging a picture I had taken down to fancy her up.

The bow turned out great I think.

She is not much but I am proud of her especially since she was my first tassel and my last thus far. She proudly hangs from my oven door and ya can not even tell she was once in pieces!

Oh, one thing I did not think of was to be sure to add some type of fluff in the center. I did not and she was a rather flat looking tassel. She just hung there. To solve this problem I took a wooden egg I had and Rub N Buffed it and then glued it to the middle of the tassel. Nobody knows its there but me but I thought it was a cute resolution to my dilemma and now she has some sass.
Thanx for stopping by! Now run over to Kimba's for other great projects!

Edited Note: Rub N Buff can be purchased at Hobby Lobby or maybe any craft outlet. If you can not find it locally look here.
http://www.amaco.com/shop/product-437-rub-39-n-buff-metallic-finishes.html

It is wonderful!! Only a teeny tiny dab will do ya and I recommend practicing before hand on something else to get the look you are wanting or else. It does NOT rub off. You will have to repaint whatever it is. I learned the hard way.

Sunday, November 8, 2009

Happy Sunday!

Hutch Update: The lady just emailed me to say they are going to move it into another room and try it there instead of selling. If she does not like it there then she will call me.I am heart broken! I had so many plans for it.

Happy Sunday morning ya'll! Hope you have a relaxing day spent with family and friends. Ours will be busy busy busy and more busy. Have make up homework for Oldest, looking at that hutch, grocery shopping, swing set assembly some more and working on listings for the shop. Be sure to stop on by and take a peek. I just added a bunch of new items from Holiday bibs, blankets and even a few pacifier clips! Off to get the monkies dressed so we can be on our way. I will let ya'll know if the hutch comes home with us!;)

My version of the popular binky clip. I actually sew the ribbon on now and the pear; snap is placed below the ribbon.

I love this vintage print by Alexander Henry! Very unique.

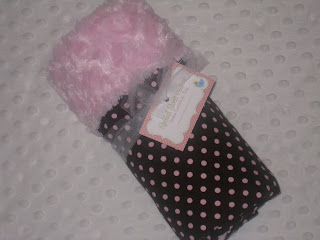
My Take A Long blankie. It is SUPER DUPER soft with a minky snail backing! Get it while ya can because I only have one made. Measures approx 18x28.

P.s I promise to not always hock my wares on ya. It just has been awhile since I listed new goods!;)