Saturday, April 13, 2013

Guest Blogging

I hope that everybody is having a wonderful Saturday! It is a beautiful day here in Texas. The sun is shining and a slight breeze is blowing so we are enjoying the outdoors.

Today I am guest blogging for Kristin over at My Uncommon Slice of Suburbia. Be sure to stop on over and say hi if you get a chance. If you do not already know Kristin and her blog trust me when I say you will just love her. She is a great inspiration.

See everybody back here tomorrow for "How I Found My Style Sundays". Also don't forget Treasure Hunt Thursday is still going on strong!


Thursday, April 11, 2013

Treasure Hunt Thursday #102 & Highlights

Welcome to Treasure Hunt Thursday #102! Sorry I am behind getting the party started this week everybody. Time just got away from me today.

Here are my top picks from last weeks party.
I am in love with Janet's guest bedroom over at Rosemary and Thyme.
Ribbonwood Cottage shared one of the prettiest spring table scapes.

The Vintage Barn caught my eye with this turquoise buffet.


Thank you so much to everybody who comes out to party every week!
If you have been featured please feel free to grab the "I have been featured" button to proudly display on your sidebar!:)

Now on to this weeks party!
What would be a HUGE help and encourage more comments not just from me but others as well would be for everybody to take off their required verification codes for leaving a comment. This seems to take just a few seconds of time but when you have to do it on 30 or more blogs it takes up a TON of time. Last week most everybody had turned off their Word Verification which made it so much easier for me to stop by everybody's links! Thank you!

READ THE RULES PLEASE!:)
Now on to this weeks party! 
As with all parties there are the normal rules. You must link back to From My Front Porch To Yours in your THT POST. Just common courtesy. If ya don't link back ya don't get to party. Only link up to your Treasure Hunt Thursday post and NOT your blog homepage. Please No advertising and PLEASE NO MORE than 3 links from the SAME party goer. Also NO MORE linking up to your own link parties. I am seeing more and more link ups of just people promoting their own linky parties. I know it takes time to go back and make a separate post to join the party but it is just the polite thing to do. If you find your post deleted it is not because I am a meany, I just have to make sure the rules are being followed. You can save some of your posts for the following weeks party!Please only link up new posts and not posts that you linked up the week before.
Also be sure to visit at least the link before you and after you to just say Hi! It makes partying all the more fun and remember if your link has had the most visits you will get featured on Tuesdays! If you are new around here I would love it if ya become a follower!:)

Wednesday, April 10, 2013

Kitchen Cabinet Painting Tutorial Using Old Ochre Annie Sloan Chalk Paint

***Since doing this tutorial I have finally completed our kitchen reno!:) To see the completed kitchen with the cabinet doors back on click here and here.***
Annie Sloan Chalk Painted Kitchen Cabinets in Old Ochre
I have had many requests asking me about our kitchen cabinets from "What color are you using?" to "How are you creating the finish?". I decided I would go ahead and share step by step the process I used. Keep in mind I have NOT been to any classes. This is just the method I have come up with.
Here is what I had to work with. Dark cabinets in a small space. I wanted to lighten and brighten our kitchen up.
Old Ochre Annie Sloan Chalk Painted Kitchen Cabinets- From My Front PorchTo Yours
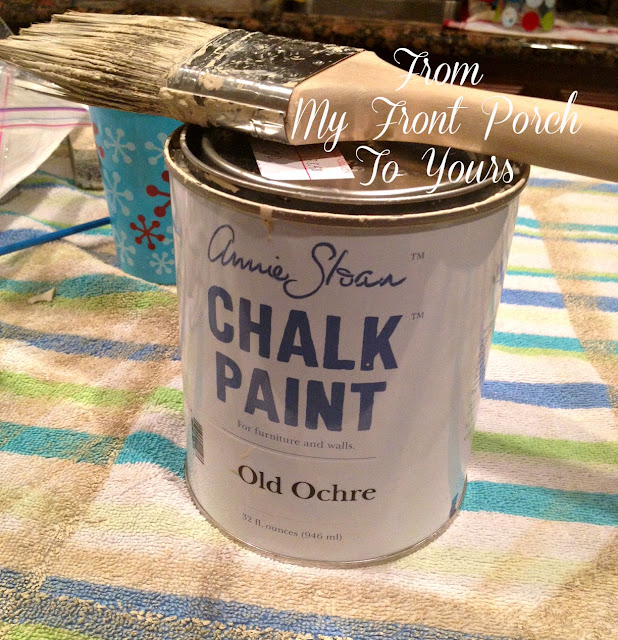
I decided to use Annie Sloan Chalk Paint in Old Ochre.I used chalk paint because it requires little to no prepping. All I did was wipe down the cabinets and dry them then started painting. 
Annie Sloan Chalk Painted Kitchen Cabinets in Old Ochre
It takes me three coats to achieve full coverage since my cabinets are so dark. To help keep the brush strokes to a minimum I dip the tip of my paint brush in some water and then in the paint. It helps the paint to go on more smoothly.
Annie Sloan Chalk Painted Kitchen Cabinets in Old Ochre
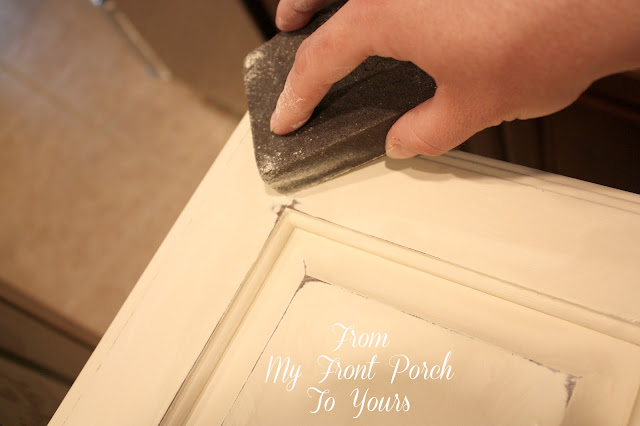
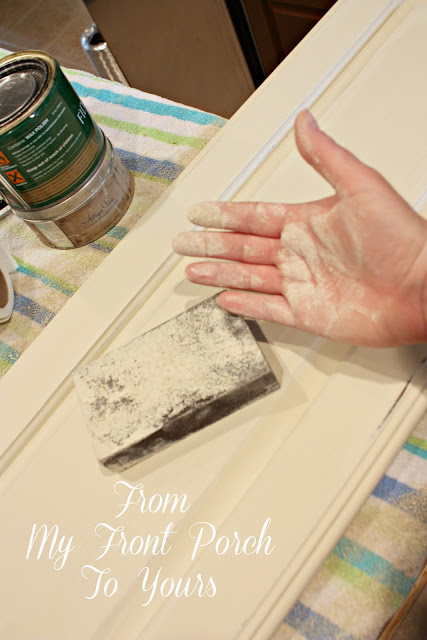
After all three coats dry I get down to sanding the surface.  My preferred method of sanding is to use a Medium grade sanding block that is wet. I prefer this method because it keeps the mess at bay. I do not have to worry about chalk dust everywhere which is a major plus since I am painting the cabinets inside the house. 
Annie Sloan Chalk Painted Kitchen Cabinets in Old Ochre
The only mess is on the sanding block and my hands. Every so often I rinse the sanding block off and ring it out. You want it wet but not too wet. Sanding with a moist sanding block makes for the smoothest finish ever! 
Annie Sloan Chalk Painted Kitchen Cabinets in Old Ochre
I distress my edges by lightly sanding in a circular motion. 
After I was done sanding I pulled out my Country Grey Chalk Paint.
Annie Sloan Chalk Painted Kitchen Cabinets in Old Ochre
I used this color to highlight the inside of the panels on the front of the cabinet doors.
Annie Sloan Chalk Painted Kitchen Cabinets in Old Ochre
To speed up the painting process I use a hair dryer to dry the paint in between coats. I actually use a hair dryer to dry every coat of paint. I wait about 5 to 10 minutes on larger areas to allow time for the paint to somewhat dry on its own and then I blow dry it the rest of the way. I have found that it makes the paint harder to come off. I allow some dry time on its own so when I take the hair dryer to it the paint won't start to crack. Always be sure not to hold the hair dryer too close because cracking may appear where you do not want it to.
After the Country Grey I went back over the edges of the panels with a light brushing of Versailles. 
Annie Sloan Chalk Painted Kitchen Cabinets in Old Ochre
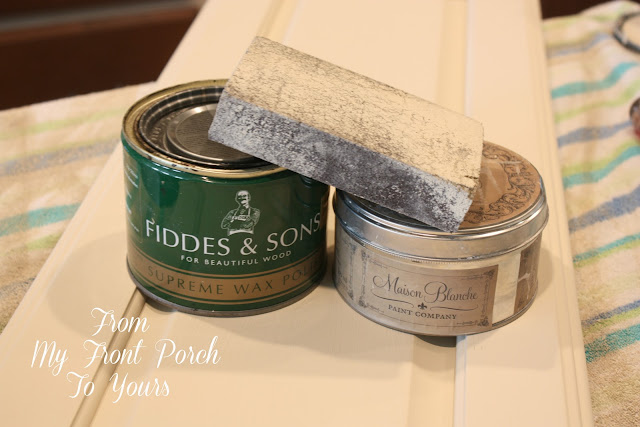
Once completed with highlighting the panels with contrasting paint colors I pulled out my clear wax and dark wax.
Annie Sloan Chalk Painted Kitchen Cabinets in Old Ochre
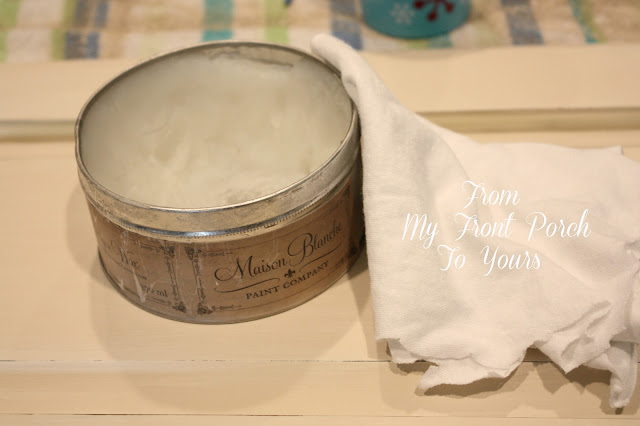
I always use Clear Wax first on my pieces. If you plan on using a dark wax this is a must otherwise the dark wax will soak into your paint and you will not be able to get it out.To apply the wax I used an old white clean t-shirt that I have cut up. You can use wax brushes or even cheese cloth to apply wax but I just prefer using an old t-shirt.
Annie Sloan Chalk Painted Kitchen Cabinets in Old Ochre
Adding the clear wax will change the color of your paint slightly. Keep this in mind when you are choosing a color.
Annie Sloan Chalk Painted Kitchen Cabinets in Old Ochre
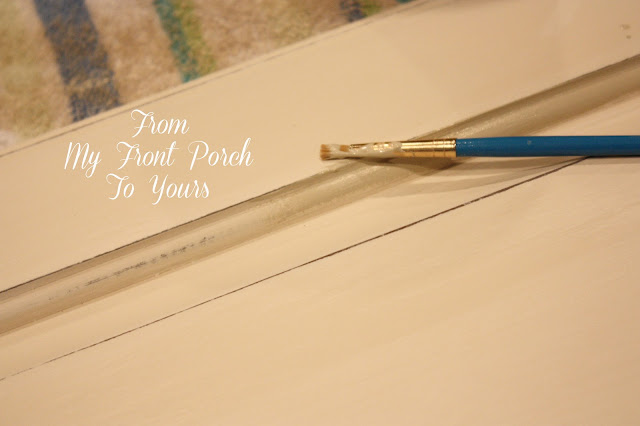
After rubbing the clear wax in I then used a dark wax for antiquing. To get into the nook and crannies I applied the dark wax with a thin paint brush. I like using a smaller brush because it saves on wax. You do not need to cake on the wax. I found out over the past few years of perfecting my technique that the thicker you put the wax on the harder it is to work with. 
Annie Sloan Chalk Painted Kitchen Cabinets in Old Ochre
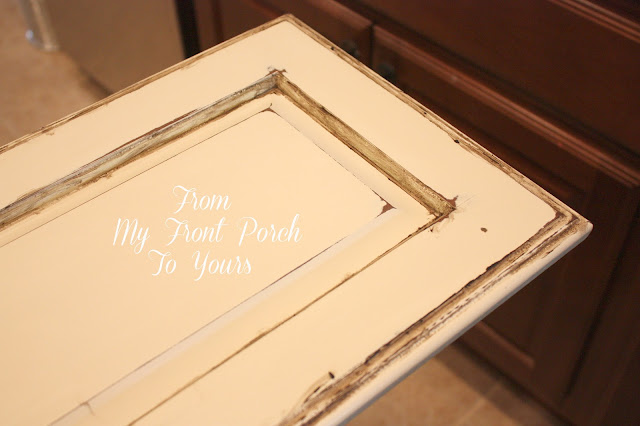
Here are all the areas covered in dark wax that I wanted to highlight/age. After the dark wax is applied all you need to do is work the dark wax back off with a small amount of clear wax on your cloth. If you rubbed too much of the dark wax off no worries you can always apply more. I used the same cloth thru the entire waxing process which enabled me to have just the right amount of dark wax on my cloth to rub lightly over the entire cabinet door.
Annie Sloan Chalk Painted Kitchen Cabinets in Old Ochre
Once I was done working the wax into the cabinet door I then used a paper towel scrunched up to buff a shine on the door. It works like a dream. Doing this does take a lot of arm power and maybe one day I will try using an actual buffer but for now this works just fine for me. 
Annie Sloan Chalk Painted Kitchen Cabinets in Old Ochre
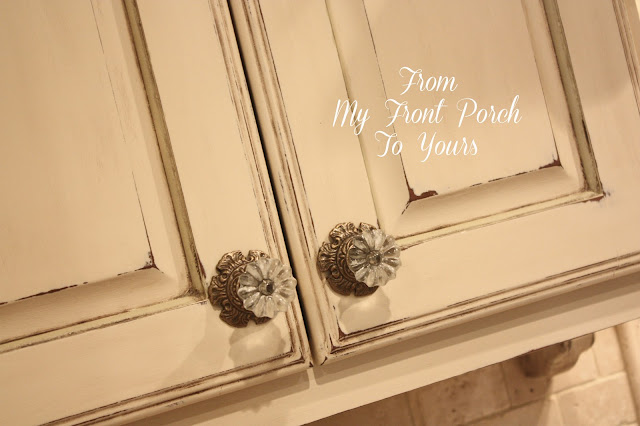
Here is the completed finish!
Annie Sloan Chalk Painted Kitchen Cabinets in Old Ochre
I know this finish is not for everybody but I just love the rustic charm it adds to our kitchen.
Annie Sloan Chalk Painted Kitchen Cabinets in Old Ochre
I debated on wether or not to use wax in the kitchen. I originally was going to use a sealer but since I had the wax on hand already I just went with it. We have a bathroom vanity that I waxed almost a year and half ago and the finish has held up beautifully so I figured it was worth a shot in the kitchen as well. Let me add that if you do a lot of cooking then I highly recommend that you do NOT use the wax but a clear sealer on your cabinets. The wax will not protect your cabinets from any stains or oil that may splatter on them. I used the wax again because it was I had on hand and because I was only painting my top cabinets. If I had painted my bottom as well then I would have waited and used a clear sealer. Annie Sloan sells a clear sealant and I have heard the Artsian Enhancements has a clear sealant that is fabulous. I have not used either yet though but have heard nothing but good results about them.
As with any waxed piece we have to be gentle with the cabinet doors to give the wax time to cure. It can takes up to 30 days sometimes a little longer depending on the humidity in your home for wax to cure/harden. Average work time for each cabinet door is about an hour to an hour and half. The time includes taking the hardware off and putting it back. It is quite time consuming but well worth it in the end.
I still have several doors left to do and to work on the desk area but I am getting excited for a full reveal.
Treasure Hunt Thursday will be up at 6:00 p.m.!:) Hope to see you at the party.

DISCLOSURE: This is just how I painted our kitchen cabinets. I am NOT an expert/professional. Paint at your own risk!;) Please take all things into consideration when you decide to paint your cabinets. Make sure you are well informed of any process you choose to do. I am just sharing what technique I used and was happy with. I used products that I like to use that others may not. I am in NO way responsible for how anyone else's projects turn out!
Linking up to the following parties:

Tuesday, April 9, 2013

Treasure Hunt Thursday #101 Most Viewed Links

Here are the top 3 most viewed links from last weeks Treasure Hunt Thursday.
1. Curb Alert-Home Tour 
2. Penny's Vintage Home- Vintage Tablecloths
3.The Velvet Door- New Living Room Rug

Thanx ladies for coming to the party!
I hope that everybody is having a great week so far. It was 81 here today! A far cry from the 54 it was last week.
See y'all back here tomorrow for THT #102!


Monday, April 8, 2013

Kitchen Update #4- Labeling

This is where I left y'all last week with our kitchen reno. The Hubster and The Papa had just finished putting up the pieces to the new custom hood we made. After that I took down the cabinet doors.
This past Saturday I spent all day painting and waxing away. It takes a long time to paint three coats of paint on each door and then apply three layers of wax. It is all well worth it though.
Here is where I am at today. The cabinets themselves are all painted, sanded and waxed. The hood is completed and as you can see I have already started playing around with decorating it. I just could not resist!;) So far this is what I have come up with. The display still needs a little tweaking but I think this may be the winning display at least for now.
I still have 7 cabinet doors to paint and wax. I plan on getting them completed this week so I can move on to the desk area. I can not wait to be done so I can finish painting the walls and making new curtains for the breakfast nook!
If you are thinking about painting your kitchen cabinets a tip that I am sure you have thought about is to label each door so you know exactly where they go. 
A tip from our lesson learned is to also label the hinges! The Hubster and I spent 30 minutes trying to get two of the doors to hang correctly after we put them back up. It finally dawned on us they were not working right because the hinges were not placed back on in the spot they came from. Now I am using a Sharpie to label all the hinges. A true time saver and sanity saver!

Kitchen Reno Part 1
Kitchen Reno Part 2
Kitchen Reno Part 3

Stay tuned for more updates! See ya back here tomorrow for the most viewed links from last weeks Treasure Hunt Thursday.

Linking up to the following parties:

Amaze Me Monday
Nifty Thrifty Tuesday
Inspire Me Tuesday
Tuesday Treasures

Wow Us Wednesday


Sunday, April 7, 2013

How I Found My Style Sundays- A Stroll Thru Life

I am Marty from A Stroll Thru Life and I am so honored that Pamela asked me to share how I found my style.  After retiring and downsizing to a home half the size of my previous one, the challenge was to pick and choose pieces that would fit, and then make them work. My style is a mix of Traditional and Farmhouse, with a touch of glitz and luxurious fabrics next to old scales, antique tins and aged leather.
Walls, carpet and tile in shades of cream and beige are a great neutral background that creates the illusion of space.  I love fabric and have used color and pattern to add interest to my rooms. Give me a few yards of fabric and my sewing machine and I can change the entire look of a room in no time and I often do.Thrifted sofa, end tables and chairs form the basis of my living room and work well with pieces I've had for years.
Our home was your typical builder basic bland, and the kitchen was the worst. Light maple cabinets, white walls, beige formica counters with white appliances, white sink and faucet and you were almost blinded when you walked in.  The first thing I did immediately after moving in was to paint the walls Ralph Lauren Soul Chocolate. This toned down some of the white and glare.
 Shortly after that I was given a remnant piece of granite large enough for the island, so a mini remodel was underway. You can read here how I waxed the cabinets for a darker color, added hardware, new sink, faucet and corbels to give the kitchen a completely new identity on a very small budget.
The kitchen is connected to the familyroom and breakfast area, and is where we spend most of our time.  This is a bright and cheery area with lots of windows and open to the patio and backyard. This room has gone through a ton of changes, mostly trying to find furniture that is scaled down in proportion to the size of the room. We now have a mix of goodwill and thrift store finds combined with hand me downs and pieces I've had forever.

My most recent DIY project was to completely redo our Master Bedroom. It started with finding the headboard at a thrift store for $75 and  painting and distressing it to create the focal point that I was envisioning. Then a goodwill nightstand and thrift store dresser that I found and refinished were the perfect additions. Mix in a small settee I already had, add some thrifted pictures and accessories and we had a whole new room.
I think my style mainly comes from accessories. They are the character of any room and I love to change them constantly. It is so fun to find  a treasure at Goodwill or a Thrift store,  and create a whole new vignette. Any surface is fair game and I use them all. A vignette tells the story of your personality and makes your home "you". I host a weekly linky party called Table Top Tuesday, this is where I show off all my latest vignettes and I get to see yours too.  I hope you will join us each week, I am always inspired by your creativity.


My advice is to be true to yourself with your style and your color. If it makes you happy every time you see it, then it is perfect and a total refelction of you, and that is always the perfect style.
Thanks for taking the tour of my home, this has been a real treat for me. I hope you will visit me a 

Thank you so much Marty for sharing your home with us! I have been following along with you for so many years and have loved watching you transform your home!