Saturday, October 8, 2011

10 Min Project= 2.5 hrs!!

I apologize in advance for the poor lighting of the following pictures! The flash was not wanting to work since there was so much natural light in the room. I am so not camera savvy. 

I now have the antique shutters hung on the wall. This was a fairly easy and painless project thankfully.

I did encounter an outlet dilemma but decided to solve it with just covering half of the outlet just in case I may need it at some point in time. Then I pondered a few on what I was going to do as far as curtains. I had two sets to choose from and after flipping thru my inspiration magazines I came up with a plan. That plan involved a quick trip to WM for a rod and some clips and 10 minutes of hanging time.

Well I thought it was going to be 10 minutes and honestly the first go around it was but then I decided I hung the rod too low so I had to move it up. This is when I started cursing up a storm in my mind and wanting to throw things. I was madder than a hoppy toad...which by the way I have no idea what that means just always have heard it....and determined. See that d*** screw there well it refused to heck and back to come out of the wall. I even took a hammer to it trying to beat it into the wall. No such luck. Then I tried to pry it out of the wall and all I got out of that was this mess. It also did not help that my ever so loving boys would come in abt every 10 minutes asking me if I was done yet.

I finally gave up the fight and just decided to bust out the Spackle. That darn screw will forever stay stuck in that wall and I figure I can just paint over it so it blends in. Funny thing is is that the one on the other side came right out! 

So that is why a 10 minute project turned in to 2.5 hours but in the end I think I am happy with the out come. I have to wait and see come tomorrow morning when the lighting is better.

So what projects have you worked on that were suppose to be simple but turned out otherwise?


Some more HomeGoods Loving

Every Friday after I pick the boys up from school I take them to Target so they can get a snack and then look around. It is kind like a tradition for us. Yesterday was pay day for me and so on the way to Target I figured it was as good of time as any to let the boys pick out their Halloween costumes. They were super excited an now I have Darth Vader and Annikin living at my house!:) Other than hearing "Mommy you are the best" I did have an ulterior motive-Mommy wanted to go to HomeGoods afterwards! Ha! Not one complaint was had because they were in a world of their own talking about their costumes all the way thru HomeGoods. 

I found these awesome pedestal frames and have big plans for them so stay tuned! I actually need to go back and see if they still have the third one I put back. 

Okay this one went against every grain in my body since it is just the beginning of Oct but I just could NOT resist! HomeGoods had just put out a TON of Christmas decor. This time of year is one of my faves at HomeGoods. There is always something there and yesterday was no exception.

I have always admired the Bethany Lowell houses but they are way beyond my penny pinching pocket so when the boys and I saw these cuties we spent 30 minutes looking at them all and trying to decide which ones we wanted. Of course they wanted to bring home all of them and really at just $10 a piece that was not a bad idea but I held back. The really neat thing is is that they are fiber optic so the windows light up and change colors. The boys just  LOVE them! Now I can not wait to start decorating for Christmas! Yes, I said it I can not wait!:)

Hope your weekend is going well!


Wednesday, October 5, 2011

Treasure Hunt Thursday #26 & Highlights

All I have to say is OMG ladies!!! Last week we had the largest turn out yet for Treasure Hunt Thursday and I could not be anymore excited than I am right now! Thank you to all who participated! I am truly honored that ya joined the party. Here is hoping for just as good of a week if not better!

Here are  a few highlights from last weeks party:

Did y'all see the awesome fire place What We Keep made? I never would have thought of that! 

We all have seen the ever so popular herb crates but Wise Designs Inspirations used these really awesome herd baskets to decorate around the house! Mandy has a great sense of style!

Anna from Kiwi In Texas  is such a great bargain shopper! She found this incredibly fun chair for just $20 on the local yard sale site! Better yet Anna lives just around the corner from me. I better watch out or she will be grabbing up all the good deals around here!;)

As always thanx so much for sharing and do not forget to grab the "I've Been Featured!" button!

Now on to this weeks party!
As with all parties there are the normal rules. You must link back to From My Front Porch To Yours. Just common courtesy. Only link up to your Treasure Hunt Thursday post and NOT your blog homepage. Please no advertising. Also be sure to visit at least the link before you and after you to just say Hi! It makes partying all the more fun!


Tuesday, October 4, 2011

New Bedding

Last night I was able to get the new bedding put on the bed so the B&B is now open for business once again!

When I saw this plaid blanket at Target a few weeks back on clearance I knew I had to have it. I wanted to add a few masculine touches to the room and I figured this was the perfect piece. And no I did NOT pay the cat to sit on the bed. Max just thinks that he should be in all the pics lately!:) He was no where to be found till I got the camera out.

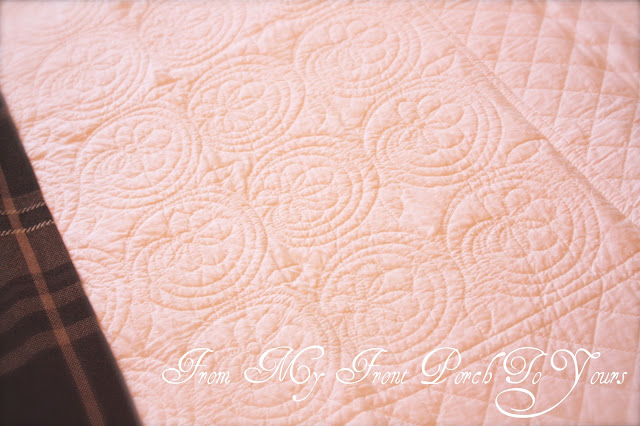
The quilt is from Target part of the Shabby Chic collection. I love the design on it.

Just a few accent pillows you have already seen. I can NOT wait till the head board is done and back in the room.

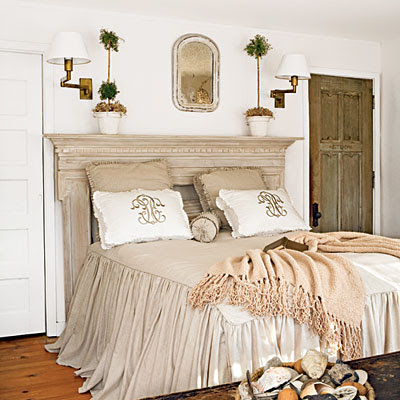
Since the head board is giving me all kinds of fits with stripping it I have pretty much decided to make it look a lot like this one.

I am dreaming about Sonya's Double Ruffle Box Pillows!! I think I really NEED me some for the bed!;) If you have not been over to Beyond The Screen Door I suggest ya pay Sonya a visit. You will not be disappointed! I wish I could sew as well as her or at least could have her as a neighbor!:) I could pay her to show me some of her tricks of the trade.

A few of you have been eye balling another new addition to the guest bedroom that I have failed to mention.

I purchased a lot of odds and ends a few months back and in that lot were not one but THREE sets of antique wood shutters! I was just waiting to find something to do with them and then  over the weekend it dawned on me to hang a set on either side of the window in here. They were already stained and work in the room just fine so one less thing to have to do. I am hoping to get them hung this weekend as well as the new curtains. 

Thanx for stopping by! I hope that your week is going well thus far. Hard to believe it is almost half over already.


Linking up to the following Linky parties:
White Wednesdays
Wow Us Wednesdays
Fall In Love With Your Home

Open House Thursday
Share Awesomeness Thursdays
French Inspiration Thursday
Show and Tell Friday
Feathered Nest Friday
Inspiration Friday
Vintage Inspiration Friday
Home Sweet Home Friday
Fridays Unfolded
Farmhouse Friday
Potpourri Friday


Bed Skirt On a Budget

Hope the week started off well for everybody! The boys were home sick today (Monday)!:( We were up all night with coughing and congestion. No fun but thankfully we were able to get in and see the doc. Nothing major just our twice yearly crude we deal with. To say least I was plum wore out by this afternoon when we got home. I was ready for a nap but knew that was a bad idea so I made myself finish up yet another project for the guest room. 

Since I was redoing the bedding in the guest room I was needing an 18 inch long bed skirt. All the ones I was finding were way out of my budget so I decided to make one instead! I found this fabulous faux linen like fabric at HobLob which was just $3.99 a yard and I had a 40% off coupon so this project was definitely in my price range.

The bed skirt was actually a bit of a challenge for me one because I had never sewn anything this large before and two because I do not own a ruffler. I had made one side which took forever!! Then I attempted the second side and the thread kept breaking half way thru. I was ready to give up but thankfully the ladies on my  FB page chimed in with some helpful hints on how I could make my ruffles without pulling the rest of my hair out! I ended up using dental floss to create the ruffles and it worked fabulously! ( Thanx Mandy!) I was also told fishing lure would work well too! I basically just used the previous bed skirt as my pattern for how long my ruffle should be width wise. 

I had two sides completed so today instead of napping I finished up the last side and then pinned the sides on to the box spring. Yes, you read that correctly!:) I just pinned the panels on the box spring so I did cheat a tad but you would never know unless I told you.

I just love Osnaburg fabric because it has a faux linen quality to it and the frayed edges to me just add to its allure. Ms. Pat at the cutting table thought I was crazy when I mentioned what I was doing with it. She had never heard of such a thing!:) To be honest I really have no idea what this fab is used for.

I just love how this layer of the guest room turned out though! If I had purchased a bed skirt similar to this in queen size it would have been well over $100 and I made it for less than $40!

Next up the rest of the bedding and then...

to finish this mess up!! What on earth was I thinking!!??

I spent the entire day Sunday trying to strip the headboard. I was going mad to say the least! My original idea was to strip it and then use steel wool on it soaked in Apple Vinegar to give it a natural aged look. I had high hopes! Now though since I have put the new bedding on the bed and have seen the entire look pulled together I should have just taken the easy way out and primed over the red and repainted it!! So  now I am left to clean up the mess I made for myself and if anybody has any tips on how to make my life easier on this project they would be much appreciated!!

Thanx for stopping by and stay tuned for even more guest room progress!

Linking up to the following linky parties:
Wow Us Wednesday


Sunday, October 2, 2011

Frenchy Chair Semi Make Over Tutorial

In my previous post I told y'all the story of this frenchy raspberry chair I purchased this last week. Though I indeed love her over all shape I knew she was slowly going to be transformed.

As impatient as I am I jumped right in on the transformation process. Since I am not any where near brave enough to reupholster it yet I decided I was going to at least make the wood frame have an old world feel. I busted out my extra wide blue painters tape and got busy.

Though an easy process it was a long process. It took me about an hour total. To make sure I had full coverage I pushed my fingernail in between the frame and the fabric which wedged the tape down.

Here she is all taped and ready for her make over. 

Here is what I used to keep the paint off the floor and so that I could make sure to get to the very bottom of the feet. Yep, those are the tops to the ever so many cups the boys bring home from dinner. We have a drawer full so plenty to go around.

Of course I pulled out my trusty chalk paint. The transformation involved three differ colors. The first I used was Paris Gray.

I used a thin paint brush. I think it was an inch wide and just dry brushed it on. Very little paint was needed and if you do not want to purchase an entire quart you can certainly complete a project of this size with just sample pots!

Next up was the newest chalk paint color Coco!

I used the dry brush method again. Here you can see the distinction between the two colors. 

Then my final color was Old White which I brushed on a bit more heavily over the entire piece but still making sure to leave some distinction between the layers. To hurry the process along I used a hair dryer to dry in between each color though this paint dries fairly quickly. I was hoping to achieve a crackle finish but I am guessing that did not happen since I did not apply the paint on thick enough. I had seen though where people have achieved the crackle with just a hair dryer. Next I used clear wax and then dark wax to finish the look up.

Here you can see the color variations.

I was not going to use the dark wax at first but I am glad that I did. It truly enhanced the piece.

I think she fits in much better now and honestly her raspberry color is not as shocking anymore. I may just keep her that way!

 Here is the fabulous toile fabric I found at HobLob this past week. I plan on using it for accent pillows. I think it goes nicely with the raspberry chair!

Hope your weekend was a grand one! We had beyond beautiful weather here but the entire fam is snotty and has chest congestion which has not been fun!:(

Thanx for stopping by!


Linking up to the following parties:
Sunday Showcase Party
Metamorphosis Monday
Amaze Me Monday
Show Off Your Cottage Monday
Nifty Thrifty Tuesday
 Power Of Paint Party
Tutorials & Tips Tuesday

Restore It Wednesday
Transformation Thursday
Creative Things Thursday 
Furniture Feature Friday