
A few days ago I stumbled upon Laurie's French Flower Pot project! If you have not seen her incredible pots you must head over because I know they will inspire you as well! I will admit I was a tad skeptical that her technique involving just paper and Mod Podge was actually going to work but again her pots turned out amazing so I decided I had to give it a try!
 |
| Remember my caddy I found at HomeGoods a few weeks back? Yep, it needed some umph so I figured why not try Laurie's technique! |
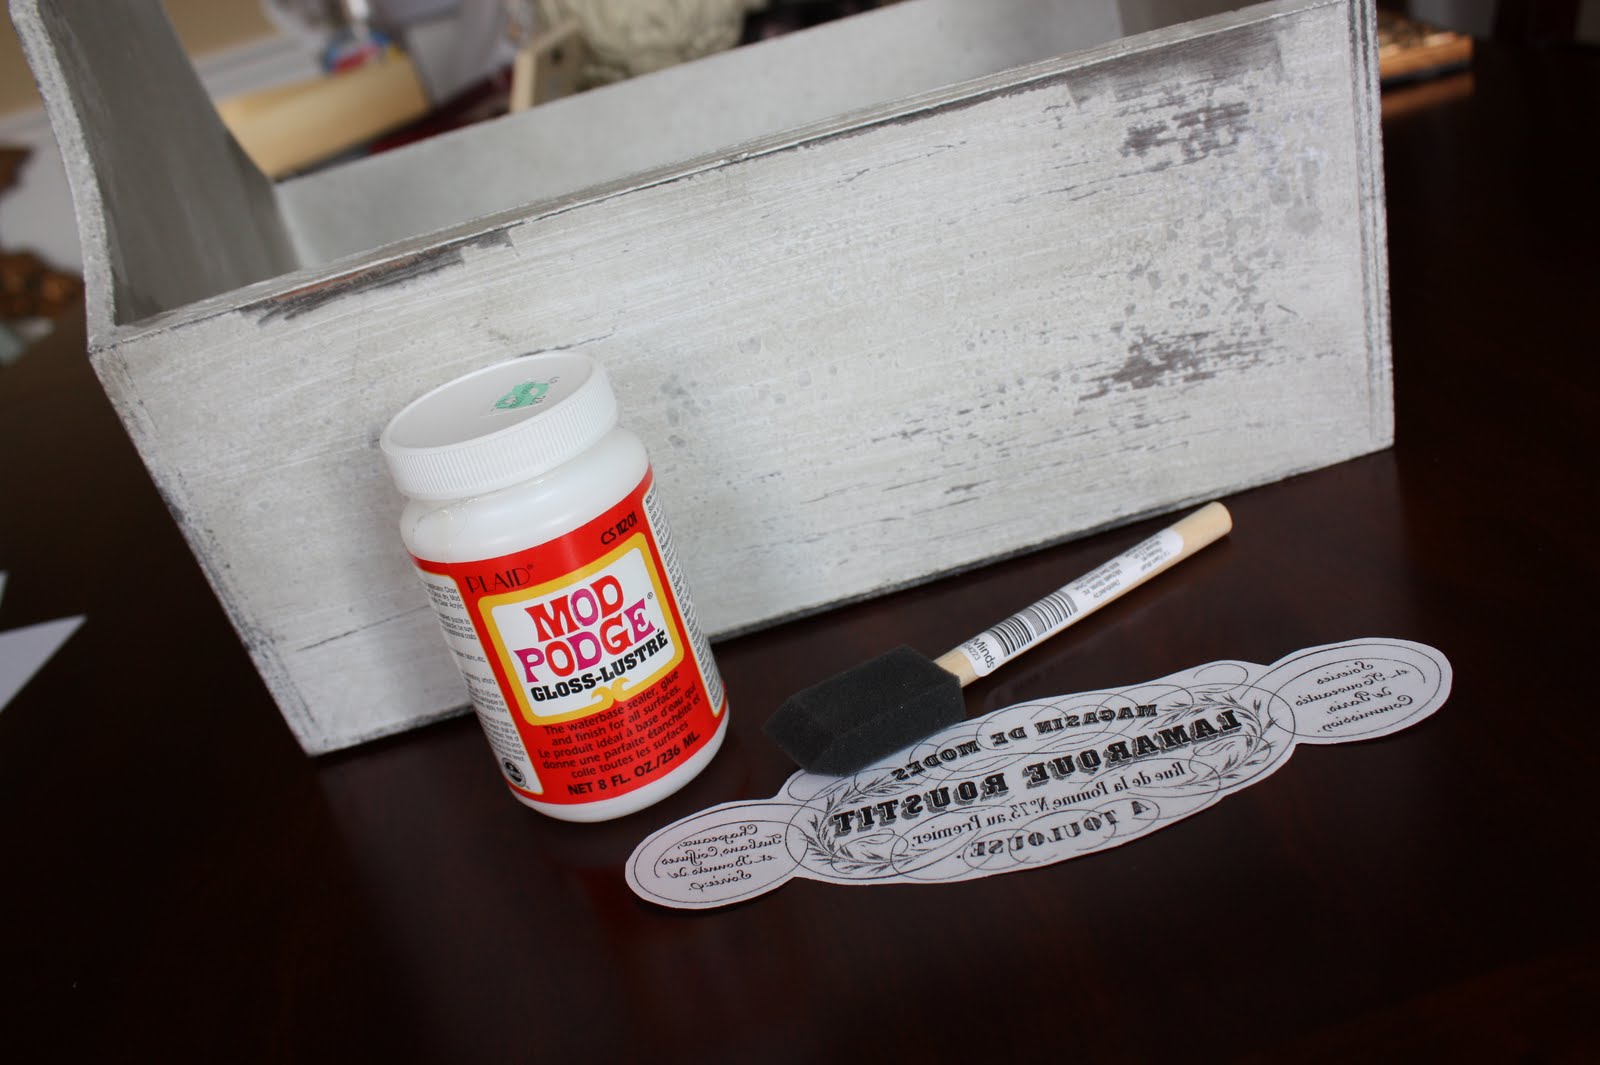 |
| I already had everything on hand so I had nothing loose! No money wasted if it did not turn out as I had hoped. I printed my image that I got off The Graphics Fairy site. I think I ended up choosing the exact same one that Laurie used but that was not intentional by any means. It just happened to be the only image I thought would look right on the caddy. I followed Laurie's direction and darkened the image just a tad using my Picnik account. It is free to sign up so no worries. It is a wonderful tool for us bloggers! |
 |
| Next I flipped the image which was easy to do in my printer settings and printed it out. Then I trimmed it to size. Next out came the Mod Podge. I coated the image as instructed to do so. You want to coat the ink portion that printed out. |
 |
| When centering the image and pressing it down I accidentally ripped the one side off but thankfully I was able to easily remove my Oops and started over. So be careful! |
 |
| Attempt #2 went much better! Now I am NOT as patient as Laurie and so I did not wait an entire night for it to dry. |
 |
| A few hours later after taking the hair dryer to it just to make sure it was indeed dry I dampened the image with just a moist paper towel. It needs to have enough water in it to squeeze a little here and there. |
 |
| After wetting it down I started the tedious process of LIGHTLY rubbing my wet finger over the paper removing the layers as instructed. I could NOT believe it this was actually working!! Here is a tip though-DO NOT trim your paper down so close to the image. Leave ya some room because you could potentially rubbed off the edge of the image. Yep, been there but in the end all was good. |
 |
| Here is the finished project! |
 |
| I just LOVE how it turned out and am sooo grateful that Laurie took the time out to show us how she accomplished this technique of image transfer! Thank you Laurie! |
 |
| I loved this process so much that I have my next victim all lined up! Stay tuned! |
 |
| Before I go, I thought I would also share that I found the cutest wire caddy for my antique silverware last week! Can you guess where I found it!? Yep, my most fave place in the entire world-HomeGoods!;) Hope your weekend is going well! Many prayers going up for those on the east coast. Linking up to the following linky parties: Saturday Nite Special-Funky Junk Interiors Sunday Showcase Party- Under The Table & Dreaming Metamorphosis Monday-Between Naps On The Porch Amaze Me Monday-Dittle Dattle Show Off Your Cottage Monday-The House In The Roses |


Love it! I may have to try that. Cute rooster too.
ReplyDeleteThis really looks like fun. I am going to have to try it on something.
ReplyDeleteTraci
This is a very neat process. Your turned out fab. Also love your flatware caddy. Our GW is the pits.
ReplyDeletelovely work...beautiful!
ReplyDeletegorgeous!!...soo pretty...Mariaelena
ReplyDeleteYou did really well on this. Thank you for taking the time to share your efforts...and your success!
ReplyDelete~Elizabeth
Oh I love it, and the plates in it, and the rooster beside it just set it off.
ReplyDeleteWow! it looks fantastic!!!! .. and I am loving the wire basket!
ReplyDeleteHave a fantastic day.
What a GREAT idea that I will have to try. You did a fantastic job. I love Graphics Fairy, too.
ReplyDeleteBeautiful job on that! Graphics fairy is wonderful and has the best graphics! I love your wire caddy and am trying like heck to remember where I saw one last week. I had my hand on it, picked it up and put it back down. Now I'm wishing I had gotten it. I know it wasn't Home Goods because we don't have one but maybe it was Marshalls. Oh, IDK! Love yours, though!
ReplyDeletePamela, that is so cute. I did not see that post and glad you shared it. How about that little trick. Looks great.
ReplyDeleteLove it, Pamela! I haven't had success with that technique yet, but I'm sure I'm doing something wrong. Maybe in the Mod Podge phase or maybe it just wasn't dry enough. I plan on trying it again and successes like yours make me hopeful!
ReplyDeleteLove the wire caddy, too! Great find!
Hi there! Thank you so much for stopping by my blog! :) I love this project that you've done! I've never used Mod Podge, but now I want to give it a try! Have a wonderful weekend.
ReplyDeleteWhat a great idea! It seems to easy to work... Think I may have to give it a try!
ReplyDeleteI love Mod Podge transfers...but this one blows all of mine away! I love the way it turned out!! GREAT job!
ReplyDeleteLooks wonderful! I have to try this.
ReplyDeleteIt looks fabulous. I definitely have to try this. Love that little wire caddy also. Hugs, Marty
ReplyDeleteIt came out perfect! Thank you for sharing this!
ReplyDeleteI love this technique and haven't tried it yet, but you've inspired me!
ReplyDeleteHave a great week!
Pam
Found your blog through Amaze Me Monday and love how your project turned out..sadly my printer won't let me reverse print. I'm your newest follower and if yo have time, come on over and link up at my party going on now. Have a great week!
ReplyDeleteThis is so cool. I tried it once but it didn't work for me. Gotta give it a go again.
ReplyDeleteI am your newest follower.
~ ~Ahrisha~ ~
I just finished a caddy I'm going to be sharing soon and didn't know what I was going to do to fill it. thanks for the adorable idea. And your utensil holder? DIE! I SO want one!! thanks for sharing---xoxo ;)
ReplyDeleteI am so glad that this worked for you. I tried it and it didn't work. It seemed to be working but I still saw an outline from the paper, it almost looked like I stuck a translusent but cloudy sticker down. Anyways, I love how your's turned out.
ReplyDeleteWhat a great idea...I'm glad you showed us the good and the bad. I think I'll have to try this and I'll TRY to be gentle.
ReplyDeleteThank you Pamela! I'm going to give it a try.
ReplyDeletewww.projectqueen.org
Hi Pamela,
ReplyDeleteI cannot wait to give this technique a try. Thanks for sharing. Love how it turned out. Have a wonderful day.
Hugs and Kisses,
♥Ana