Saturday, January 26, 2013

How I Created a Grain Sack Table

Today I spent the afternoon making a grain sack table. 
Yesterday I met up with Linsey from The Farmhouse Porch and Anita from Cedar Hill Ranch for lunch and some shopping at Old Town Spring. I had promised myself before we went that I was going to be good and not spend any money.
Well, I broke that promise when I spotted this adorable little farmhouse table. I HAD to bring it home with me because it was a great price which made me not feel too bad about breaking my promise!;)
I knew when I bought it I would be making it over. The orange red color just was not working for me and as you can see it had been loved big time. It even had a crack down the center but that was fine with me. It added to its charm.
After painting the entire table Country Grey I decided it needed something more. Since it had the crack down the center I knew I had to make this little table into a grain sack table. I could not find any painters tape so I just found a straight edge and drew the outer lines of the grain sack stripe.
I hand painted the stripes in black.
I actually liked that I didn't have perfectly straight lines. 
Next up I white washed the top.
White washing the top though left paint in the cracks of the table. I did not like that so out came the tooth floss!:)
Next I decided to use my AS Craqueleur to add some more age to the piece.
My hair dryer is always by my side when I am using Craqueleur. I am just too impatient to wait for it to dry on its own.
The top of table has only been clear waxed. The bottom portion has been clear waxed and then I added a little dark wax to bring out all the cracks.
Here is what I ended up with. I was quite pleased with the results. It looks like it was painted years ago.
I even took the grain stack stripe side down the sides.
I am so glad I found this little table yesterday and so glad I got to hang out with some fabulous ladies! I can't wait till our next outing.
Linking up to the following parties:

Thursday, January 24, 2013

Treasure Hunt Thursday #91

Welcome to Treasure Hunt Thursday #91! What a fabulous turn out we had last week. I was able to stop by everybody but was not able to leave a comment just yet. Know that I do appreciate you coming to party every week! Lots to look at last and here are my to picks.
Beaux R'eves shared their guest bath and I am now on the hunt for a similar holder for towels!
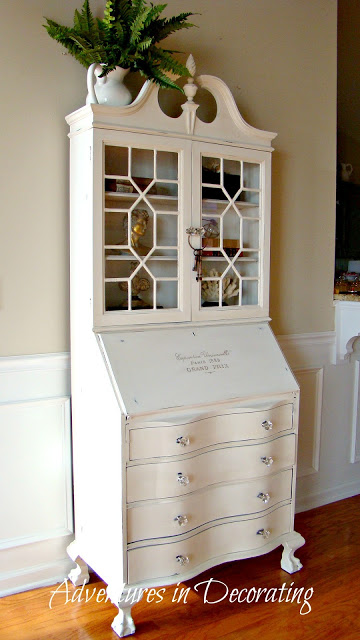
Adventures In Decorating must have been reading my mind when she bought a vintage secretary to paint. I love how it turned out! 
Dwellings shared their amazing master bath makeover.
I loved The Rusty Heart's Valentine mantle.

If you have been featured please feel free to grab the "I have been featured" button to proudly display on your sidebar!:)

Now on to this weeks party!
What would be a HUGE help and encourage more comments not just from me but others as well would be for everybody to take off their required verification codes for leaving a comment. This seems to take just a few seconds of time but when you have to do it on 30 or more blogs it takes up a TON of time. Last week most everybody had turned off their Word Verification which made it so much easier for me to stop by everybody's links! Thank you!

READ THE RULES PLEASE!:)
Now on to this weeks party! 
As with all parties there are the normal rules. You must link back to From My Front Porch To Yours in your THT POST. Just common courtesy. If ya don't link back ya don't get to party. Only link up to your Treasure Hunt Thursday post and NOT your blog homepage. Please No advertising and PLEASE NO MORE than 3 links from the SAME party goer. Also NO MORE linking up to your own link parties. I am seeing more and more link ups of just people promoting their own linky parties. I know it takes time to go back and make a separate post to join the party but it is just the polite thing to do. If you find your post deleted it is not because I am a meany, I just have to make sure the rules are being followed. You can save some of your posts for the following weeks party!Please only link up new posts and not posts that you linked up the week before.
Also be sure to visit at least the link before you and after you to just say Hi! It makes partying all the more fun and remember if your link has had the most visits you will get featured on Tuesdays! If you are new around here I would love it if ya become a follower!:)

Tuesday, January 22, 2013

Most Viewed Links From THT #90

It is that time of the week again to see who had the most viewed links from Treasure Hunt Thursday. First let me say thank you so very much for all your kind comments on our laundry room makeover! I appreciate it so very much!!

Now to the most viewed links!
White Lace Cottage- Table Makeover
Divine Theatre- Craigslist Find
Cottage Living From Beach to Burbs- Winter Mantle
Northern Nesting- Cabinet Vignettes

Be sure to grab that "I've Been Featured" button ladies. See everybody back here tomorrow for Treasure Hunt Thursday #91!

Monday, January 21, 2013

$100 Laundry Room Makeover

Back in November I started getting the itch to change our laundry room up. With a tight budget ,holidays trips, broken washing machine, and more holiday festivities I was unable to make any head way. Over the past two weeks I kicked it into high gear though and I am excited to say that I have finally completed our laundry room makeover. The best part is that I only spent $100!
Welcome to our newly renovated laundry room. 
Sorry it is so bright but the lighting was a challenge. I could not turn the overhead lighting off and with it on it is really bright. I need to get lower watt bulbs. Let me start off by saying that I am NOT including our new washer and dryer in my renovation total. They were replaced on necessity and had no bearing on my decision to change things up in here.  After the new washer and dryer arrived the first thing I did was paint. To save money I picked out my color and then went to WalMart and had them color match it for me. I am the only one who uses this room so I did not feel the need for a $30 gallon of paint. Paint and supplies cost me about $20. The color is called Autumn Haze by Glidden. It is a great creamy neutral.
I was able to talk The Hubster into taking down our fluorescent light. I hunted high and low for a new light for in here to no avail. Nothing really jumped out at me. Last week I came across a french chandy and two matching sconces for just $86 for all three on the local yard sale site. What I ended up doing after bouncing ideas around and talking to my mama was to take down the chandy that was in our dining room and place it in here. To be fare I will say that it cost me $43 for a new light for in here. I just split the cost of the new chandy for the dining room and sconces in half. 
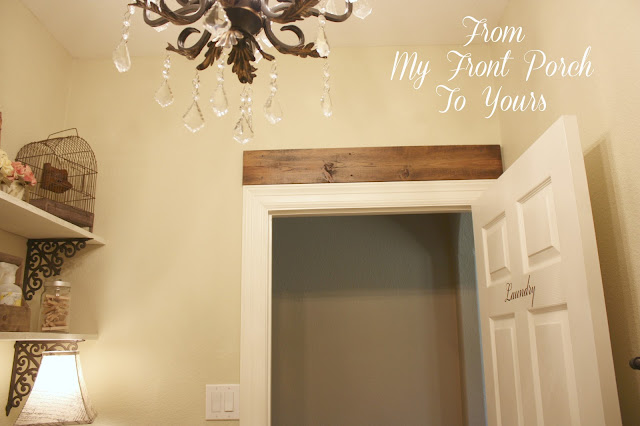
Back in December I won a $250 gift certificate to a local decor shop Laurie's. This architectural piece was one of the things that I purchased with it. I had no idea where I was going to put it but after I took down the vinyl saying I had on the wall up there this turned out to be the perfect spot for the piece. Cost to me free.
I painted our cabinets with Annie Sloan Chalk Paint that I already had on hand from other projects. I used Country Grey and Vintage White. Cost to paint cabinets nothing since I already had the paint. 
I changed out the cabinet knobs which I already on hand as well. Whenever HobbyLobby has 50% off knobs I always snag some for a rainy day. If I had not already had them it would have cost me less than $7 for all four.
I made my own chalk board labels with supplies on hand.
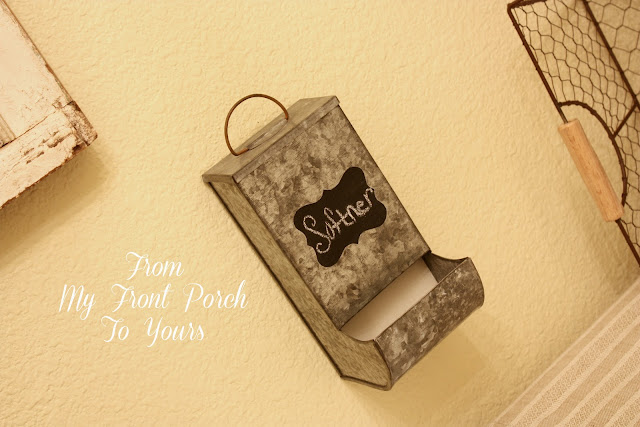
I have had this decorative self feeder for awhile now just waiting for a use. It dawned on me that it would be perfect to hold my fabric softener sheets. BEFORE anybody points it out YES I already see that I spelled softener wrong!;) I just didn't have time to correct it. Once I do I will replace the pic.
I took down two of the iron pieces I had up here and replaced them with mirrors I had bought back in July when antiquing with my mama. They were just laying around collecting dust.
I love the detail on them!
I put back up my drying racks. These originally came from HobLob.
I already had this french linen looking table runner and decided it looked perfect in here. I bought it a few weeks back at HomeGoods for just $12. I did not include it in my $100 total though because I already had it on hand. 
My mama had bought me this vintage baptism gown back in July. It use to hang on the back of the guest room door.
I spent $13 on lumber to create faux wood beams.

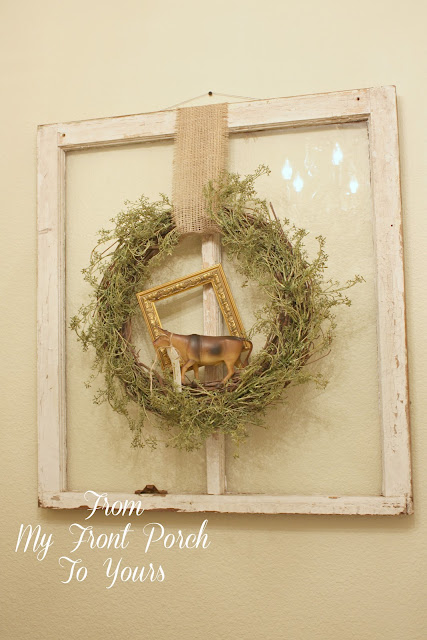
The old window use to hang in our master bath and I had all the supplies already on hand for the wreath.


I already shared how I transformed this vintage dresser into a retreat for our Little Lady's kennel. If you missed that post you can see it here.
Cost for that makeover was nothing since I already all of the supplies on hand again. These knobs are from HobLob and are my favorite!
I spent $25 on iron brackets from HobLob and lumber to create the new shelving.
Frame from my frame collection and flowers I have had since our first home back in 2002.
Rustic bird cage I bought back in the fall.
Vintage cow I bought back in the summer. Can you tell I love cows!;)
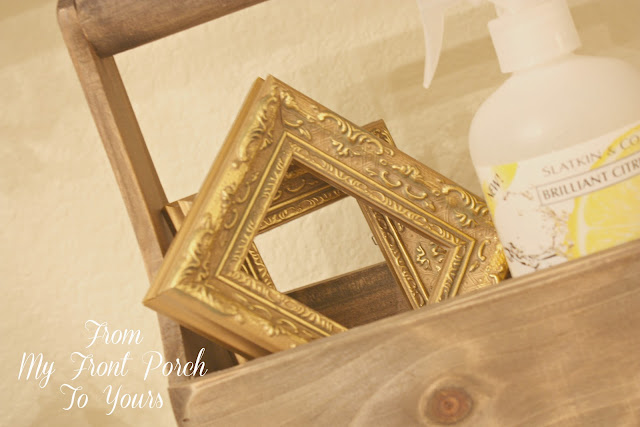
Little gold frames my mama gave me for Christmas.
Vintage scale I purchased back in July.
Old washboard that I had in here previously. I just turned it around because I liked the black writing on it instead of the red that is on the other side.
Note that my before pic here is really awful. I could not find one where I had the new accessories and stuff in there from the previous makeover in 2010 so trust me when I say it did look much better than that. You can see more pics of what the laundry room looked like before here.
 $100 later and lots of sweat equity I have the laundry room of my dreams and you can too! Just come up with a vision for your space by browsing places like blogs, FaceBook, HomeTalk, and Pinterest. After months of browsing inspirations my final inspiration came from the blog Faded Charm. I fell head over heels for Kathleen's laundry room. You can see it here. Next just look around your house for items you already have on hand and hunt down bargains for the items you do not. It may take a little longer but trust me it will be well worth it in the end!
 Linking up to the following linky parties: