Friday, April 13, 2012

Treasure Hunt Thursday #52 & Highlights

Welcome to THT #52 & Highlights! Hope everybody's week is going well. I can not believe it is Thursday already. I really appreciate y'all not minding that I changed THT to post on Thursday mornings. It works out so much better for us. No more trying to get it posted in between dinner and homework.

This weeks features all have something in common that I did not realize until I was doing the THT post. They all are newbies to to the bloggy world!!! So be sure to stop on by and welcome them in to the world of blogging! I look forward to getting to know each of these ladies!

Patti over at It's a Sweet & Savory Life created this frenchy lazy susan. She bakes some delicious treats as well and shares the recipes!

Laurel over at The North End Loft made this fabulous bunny tray! I am in LOVE with it! I know Easter is over but the great thing about this tray is that you can display it all season if ya want! Laurel certainly knows how to get her craft on so while over saying hi browse her posts. She even shares vintage graphics for your own projects!

Laura over at Our Prairie Home gave this vintage dresser a fabulous new life! Laura is in the process of making over her home and has lots of other great projects to share as well. Pop on over and say Hi! You won't be disappointed.

As always thank you to all who partied last week! I am so truly honored to have such talent partying at my place! If you were featured please feel free to grab the "I've Been Featured" button!:) I have the newly updated button with html code on my sidebar! 

 What would be a HUGE help and encourage more comments not just from me but others as well would be for everybody to take off their required verification codes for leaving a comment. This seems to take just a few seconds of time but when you have to do it on 30 or more blogs it takes up a TON of time. Last week most everybody had turned off their Word Verification which made it so much easier for me to stop by everybody's links! Thank you!

READ THE RULES PLEASE!:)
Now on to this weeks party! 
As with all parties there are the normal rules. You must link back to From My Front Porch To Yours in your THT POST. Just common courtesy. If ya don't link back ya don't get to party. Only link up to your Treasure Hunt Thursday post and NOT your blog homepage. Please No advertising and PLEASE NO MORE than 3 links from the SAME party goer. Also NO MORE linking up to your own link parties. I am seeing more and more link ups of just people promoting their own linky parties. I know it takes time to go back and make a separate post to join the party but it is just the polite thing to do. If you find your post deleted it is not because I am a meany, I just have to make sure the rules are being followed. You can save some of your posts for the following weeks party! Please only link up new posts and not posts that you linked up the week before. Also be sure to visit at least the link before you and after you to just say Hi! It makes partying all the more fun! If you are new around here I would love it if ya become a follower!:)

Wednesday, April 11, 2012

Thinking....

Thinking of starting on a project today. Can you guess what it might be?

Tuesday, April 10, 2012

Towels & A Curtain

 After making a pillow last week from a napkin and some jute webbing I became addicted. I started thinking of all the things I could turn into pillows!
Just so happened I had these dish towels I purchased a few weeks back and a beautiful damask curtain. Remember when I told you I had something different planned for the curtain?! Well after my men went to bed Sunday night I went to play in my sewing room.

This is what I came up with! I had never made anything with ruffles before except for the guest room bedskirt. I figured I could just wing it and thankfully it turned out just perfect!

This is the mate to the bee pillow.

I am really loving how they turned out. 
 Linking up to the following link parties:


Monday, April 9, 2012

The Elusive Blind Stitch

Happy Monday y'all! I hope that everybody had a blessed Easter weekend with friends and family. The Hubster was at home ALL weekend which was fabulous! He has been working turnaround since January which involved him working 14 day stretches. We were glad to have him at home with us. Our Easter was quiet and nice.
In my last post I showed y'all the napkin pillow I made. I was having major issues trying to figure out how to blind stitch it closed. After hours of watching videos and reading tutorials I was still at a loss. Thankfully my good friend Jennifer who is an upholster showed me the trick. Many of you requested that if I figured it out to share so share I will attempt to do. I am NOT a pro and I am sure those who have been sewing for many more years than me have a much better explanation but this is the best way I can explain it.
Jenn told me the trick was a curved needle. She uses a suture needle that her Grandaddy gave her. I am so thankful she took the time out to help me! It was a HUGE help to actually see the stitch done in person so I highly suggest if ya know a sewer be sure to ask them first rather than trying to figure fit out on your own. 
After Jenn showed me the stitch the boys and I headed to HobLob in hopes of finding a curved needle.  Thankfully they had some. It was in a pack called repair needles.
First pin your closure shut. This helps greatly but you will find as you go along you can take them out.
Thread your needle. I purchased heavy duty thread so that it would not break when pulling on it and because the thicker it is the larger the knot is at the end so it is less likely to pull thru the fabric. I am using the smallest/skinniest curved needle in the pack.
Next make your first stitch at one of the ends of the closure.
Here is what that looks like. You are stitching the inside of the fabric on each side. 
Next up I turned my pillow around and started stitching on the opposite side in the opposite direction of the initial stitch. This is a MUST or it won't close correctly. I know this from first hand knowledge!;) 
Now you just alternate from side to side with your stitching. Do not make your stitches to far apart or you will leave gaps in between.
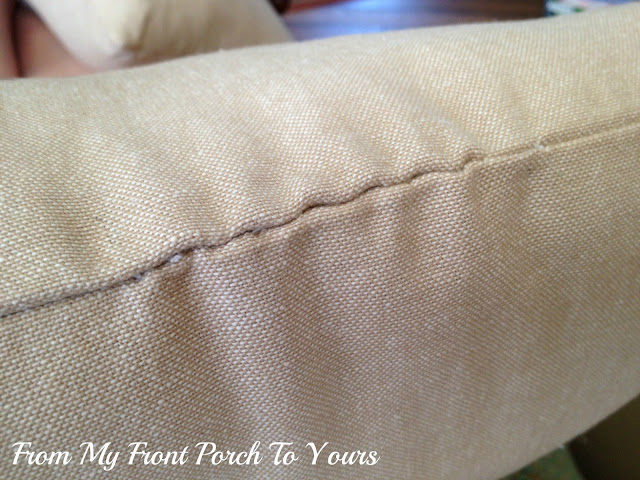
Also as you go along be sure to pay attention so that you do NOT stitch all the way thru both sides of the fabric. I finished up my blind stitch and it looked good but this is what I found when tying the knot off. I had to start all over.
 Just keep alternating the side you are stitching on till you get the end of the closure.
Tug a little and tie it off with a knot. This was still loose looking since I stitched a bit further down in to the closure. Easy fix!
I just went back and completed all the steps over again. Doing so just makes your stitch least likely to pop back open or pull.  
Blind stitching to me is a much more appealing option to close up a pillow rather than a machine stitch across the bottom or a whip stitch. It gives you a cleaner look.

Again I am NO expert and honestly it took me NUMEROUS attempts to get the stitch right. So don't get frustrated just know that you may have to take the stitch out several times before you get it right.
Not sure how helpful this tutorial is but hopefully somebody will find it useful!;)

With blind stitching under my hat I had some fun making a few new pillows yesterday after my men went to bed. Be sure to come back tomorrow and I will share them with y'all!

Have a grand Monday!

Linking up to the following linky parties: